In Coroico, we visited the Unidad Académica Campesina-Carmen Pampa, which is a satellite campus of the Catholic University. The school offers a variety of programs, including agriculture. The university was founded by a Franciscan nun named Sister Damon, and she insisted that the agriculture would be organic. So it is. This is quite remarkable in Bolivia, where chemicals, including illegal ones, are routinely used. Good coffee is typically grown in areas with some altitude, and this area (about 1400 meters, or 4600 feet above sea level) is no exception.
Step 1: Harvest
Our coffee journey began among the coffee trees where we helped harvest coffee. The students must do a certain amount of work along with their studies, so we had several students with us who had the lucky job of harvesting coffee. They helped show us how it's done. It's not terribly complicated, but you want to only pick ripe fruit (called "coffee cherries" because they sort of resemble cherries), and the trees and fruit in this area were so covered in dirt that you couldn't tell what was what. The dirt likely came from the nearby dirt road, and it wasn't washed off because it was the dry season and has been for some time.
There are two varieties here. The red ones are criollo (creole), and the yellow is a higher producing variety called catura. The trees of the yellow variety are short and each branch has tons of coffee. The yellow variety is preferred by people here because of the high production.
A pest called "broca" (coffee borer beetle) was brought to this region during an effort to bring in high producing varieties. This occurred under the Agroyungas Program, a disastrous effort to bring in new varieties and production methods (fertilizer, pesticides) in this area from 1985 to 1991. The goal of the program was to get farmers to switch away from growing coca. Unfortunately, the new inputs brought in were given to farmers on credit, just before global coffee prices crashed.
Our guides told us that the reason why coffee is grown in shade has to do with maintaining the humidity. Here they shade the coffee with the siquili tree.

An area of coffee trees, under a shade canopy.

A coffee tree with ripe coffee
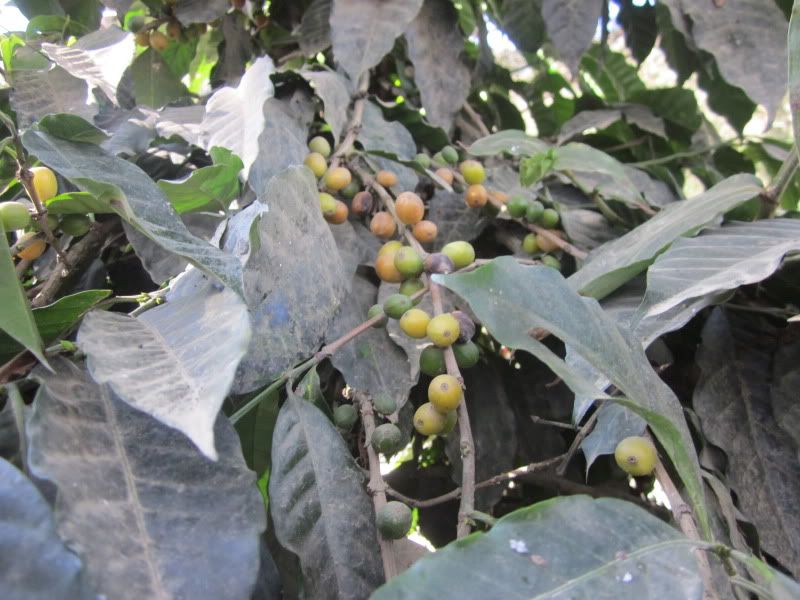
Coffee cherries. This is a yellow variety, but the fruits aren't all uniformly ripe. We need to find the ones that are entirely yellow and just harvest those.

A student shows the ripe coffee cherries he's harvested. The students are required to do 80 hours of service work each semester, and one way to fulfill that is by harvesting coffee.

I give harvesting coffee a try. I'm really worried I'll pick an under-ripe fruit by mistake!

Ok, I'm not as good as the pros, but I've found a few.

Coffee flowers

Mmm. THIS is what turns into my favorite drink!
Step 2: Grading
Here, grading is done entirely by hand. Because Carmen Pampa has a coffee processing facility, local growers bring their harvested coffee here, where they paid on the spot for them. The students take a lot of responsibility for coffee processing, and the finished product is sold, likely for export.
The coffee is graded into three categories, primero (first), segundo (second), and tercero (third). This is entirely based on the appearance of the fruit itself. Mature fruits are firsts; partially ripe ones are seconds; the rest are thirds. The coffee bean is the seed of the fruit. Each fruit has two seeds.

Unsorted coffee. Time to sort them!

The sorting area.
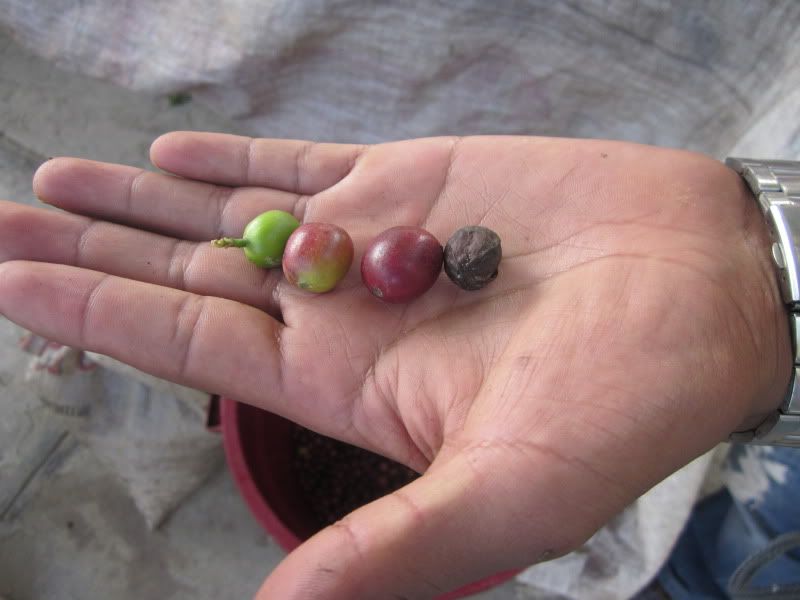
From left to right: Unripe (third grade); partially ripe (second grade); ripe (first grade); and over ripe (third grade).

The second grade pile

Over ripes (thirds)
In addition to processing their own coffee, UAC-Carmen Pampa sends a truck around the community to pick up the harvest from other campesinos nearby. They told us they pay the growers 220 Bolivianos ($31.88) per quintal for first quality coffee. According to the internet (which is always factual, of course), a quintal of coffee is 100 lbs (46kg) of dried, green coffee. That equates to 250kg of coffee cherries. Therefore, the two coffee bean in each cherry, once dried, weigh less than 1/5 of a coffee cherry. I hope that the 220 Bolivianos figure I was given is incorrect. If it's correct, it means that out of every pound of coffee, the Bolivian farmer gets just over 30 cents.
Step 3: Peeling
Next up, peeling the fruits. The peel must be removed so that the fruit can be fermented (and then removed). In the past, they used a hand-cranked machines. They still use it for small batches, but mostly they use a larger, mechanized peeler they got from USAID.
Assuming they got the machine before recent changes in Bolivia's relationship with USAID, they probably had to agree to some conditions in order to get it. And I would bet those conditions involve NOT GROWING COCA (or not teaching agriculture students how to grow it). USAID's quest to promote alternate crops instead of coca make this coffee processing facility very much in their interest, since it gives local farmers a market for coffee and thus, a way to earn money other than growing coca.

The hand-cranked peeling machine.
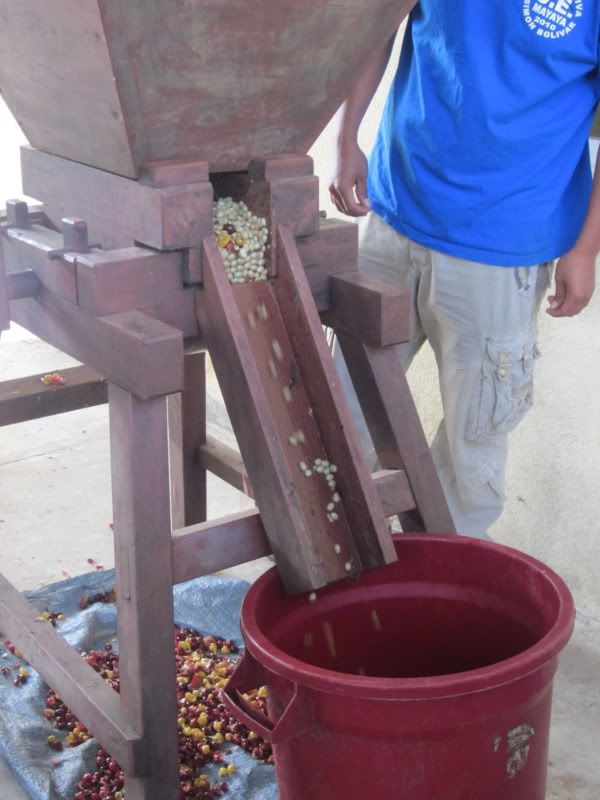
Peeled fruits go in the bucket, peels go on the floor.

I give it a try.
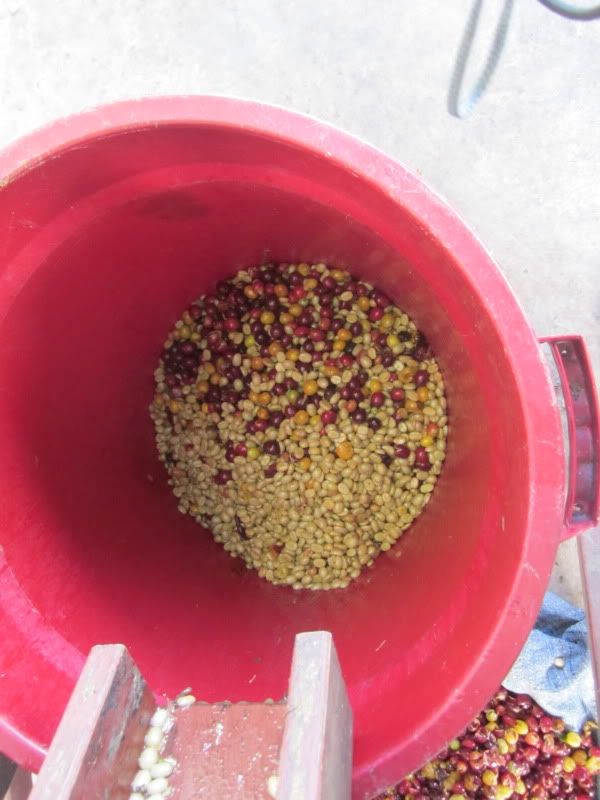
Peeled fruits. And some unpeeled fruits. The machine isn't perfect.
Bolivian peasants don't have much of a coffee-drinking culture. Besides, they can make more money if they export the best coffee than if they sell it domestically. But the peels of the coffee fruits, called sultanas, are a waste product that will go nowhere other than maybe someone's compost bin if they aren't consumed. Those are dried and used as a tea, which is common in the Bolivian countryside. Most people around here can't afford to drink coffee. I tried the tea and it is okay but not great. It doesn't have caffeine and it doesn't taste like coffee. They say it lowers cholesterol.

Coffee fruit peels, called sultanas. These are dried and drank as a tea. It's not caffeinated, and it doesn't taste like coffee.
The machine from USAID is large. By standing on top of it, one can pour in the coffee fruits and then turn the machine on. The fruits are then deposited into one of three pits, depending on their grade. The machine doesn't automatically know the grade of the coffee; the humans operating it must only put in one grade at a time and then configure the machine so it sends them to the right spot.

USAID sign
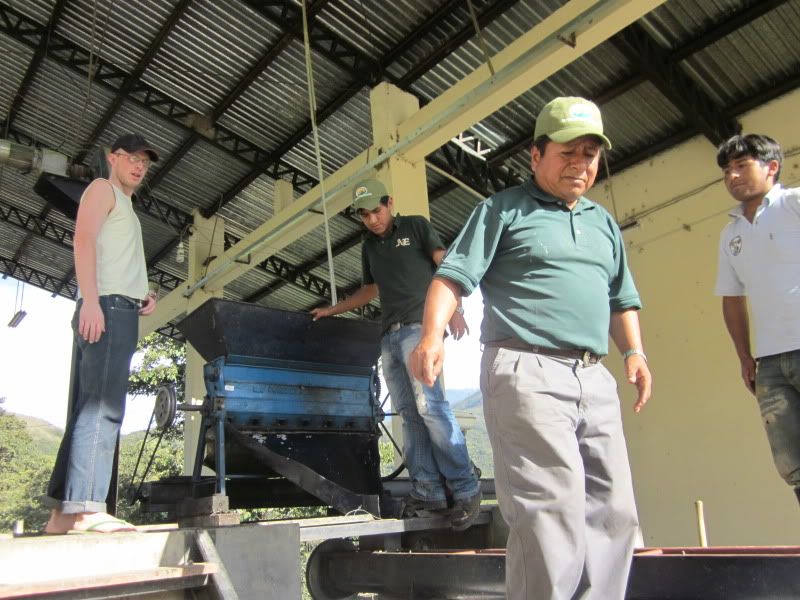
On top of the machine. In the back, between the student and Daniel (from our group), you can see the area where the coffee cherries are put in for peeling.

Here's where you pour the cherries.
Step 4: Fermenting
When the peeled fruits fall into one of the three pits, they sit there for about 12 hours and ferment. They need to be careful to maintain the white color of the coffee during fermentation because if the beans turn yellow, they will be considered lower quality and worth less money. They ferment it without adding any water. You can speed the fermentation process up by adding water, but it can stain the coffee and lower its value.
When we arrived, the batch that was fermenting had been there about 12 hours. That meant it was time to wash it. At this point, some water has been added to the fermenting coffee to help with the washing process.

The fermenting area. These cherries have been fermenting for about 12 hours already, and they are ready to be washed. No water is added to the fermenting cherries until it is time to wash them.

Closeup of fermenting cherries.

Did we mention this was a gift from the U.S.? Oh we did? Well, we'll say it again. And thank you for not growing coca.
Step 5: Washing
After the fruit has fermented, washing is necessary to get the remains of the fruit off of the seeds (the coffee beans). It was hard to get good pictures of this step, but basically the fermented fruits come out of the pits they were fermenting in into a little channel where they are washed with water from a hose into the washing machine.
That area was hard for me to see, but it appears that they go into the machine from the bottom and the water has enough pressure to remove the peels and ultimately force the washed seeds (the beans) out the top of the machine and down a little chute into a bucket.
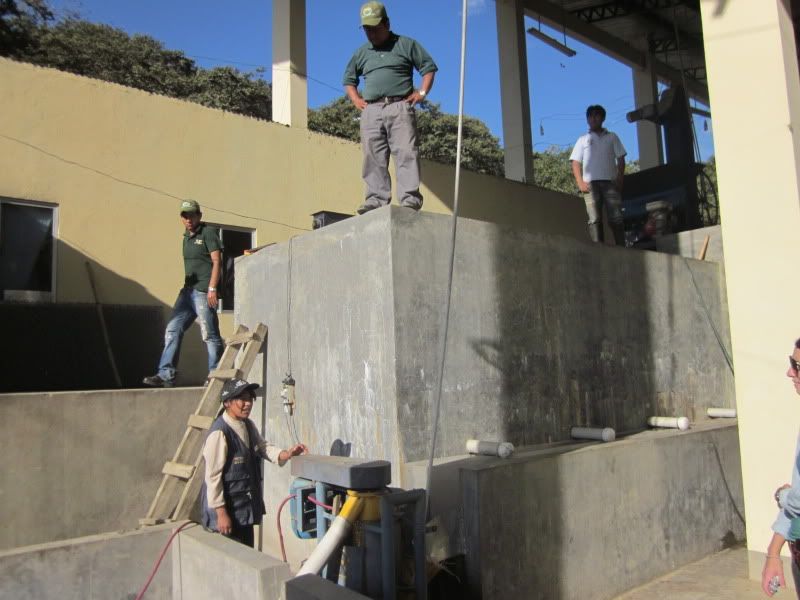
When it's time for washing, the cherries come out of the fermenting pits on the side of this structure facing the camera, out of the little white tubes.
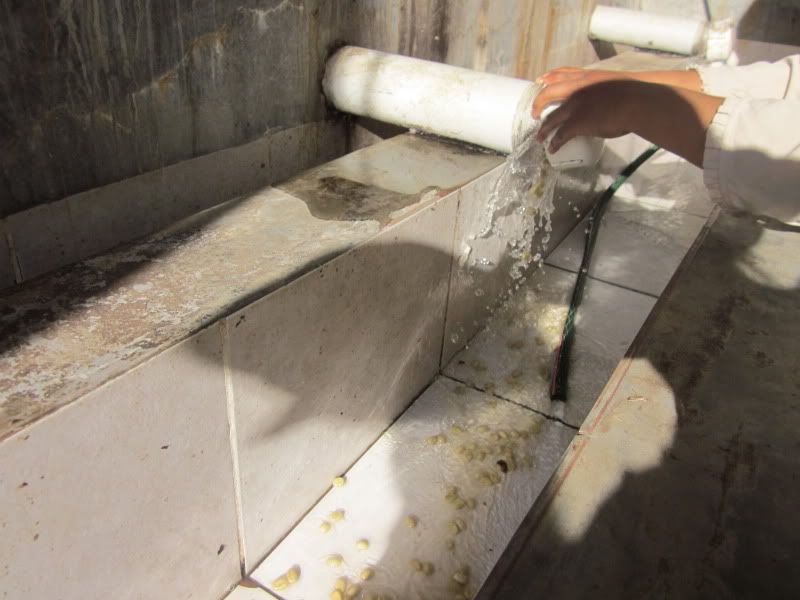
Letting coffee cherries out of the fermenting area to be washed. They are washed forward with water toward another machine that gets all of the fermented fruit off of the seeds inside, which are the coffee "beans." (There are two seeds per fruit.)

The student who is in charge of washing the coffee. She carefully lets a few cherries out of the fermenting tank at a time so they reach the washing machine at the right rate.
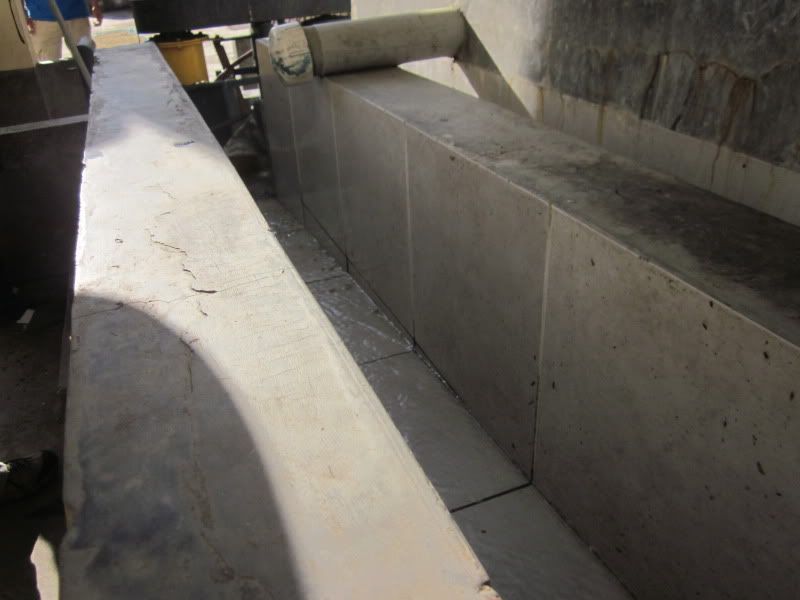
Here's the path that the coffee is washed down.

Here, you can see a few cherries floating forward in the water toward the machine that does the washing.

The washing machine. I think the coffee enters on the bottom and comes out the top.

A side view of the same machine.

The tube that spits out the washed coffee beans.
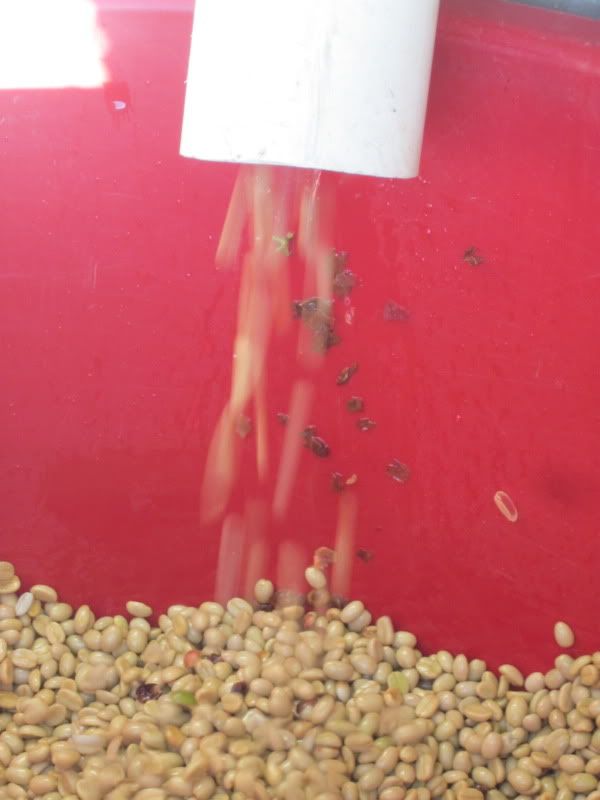
Washed coffee beans exit the tube into a plastic tub.

The washed beans.
Step 6: Drying
Now it's time to dry the beans. It takes the beans 2-3 weeks to dry. The beans are laid on a mesh cloth and tagged with identification about each particular batch. First grade beans and second and third grade beans are dried in different locations, with the first grade beans getting priority for the better drying locations. First grade beans are dried above the ground so the moisture can drip down, and under a tent so they won't be wet by any rain. Second and third grade beans go on the ground and they are manually brought indoors each night or when it rains.
As the beans dry, the chaff begins to separate from the bean. This is the outer coating of the coffee seed. When the beans are dried, they are tested by biting into one: a dry bean will be hard. If they pass the biting test, they are tested more scientifically using a machine that tells the moisture content of the bean. They need the moisture content to be 12%.

Pouring the beans on a mesh cloth for drying.
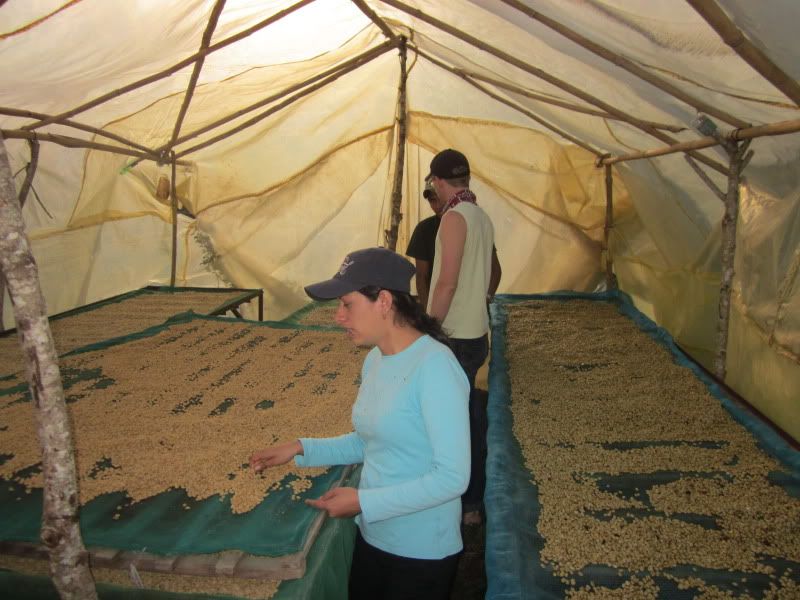
The coffee is dried under a tent to keep it dry if it rains (as it frequently does here.)

Drying coffee.

As it dries, the workers remove any bits of fruit or anything else that doesn't belong here.
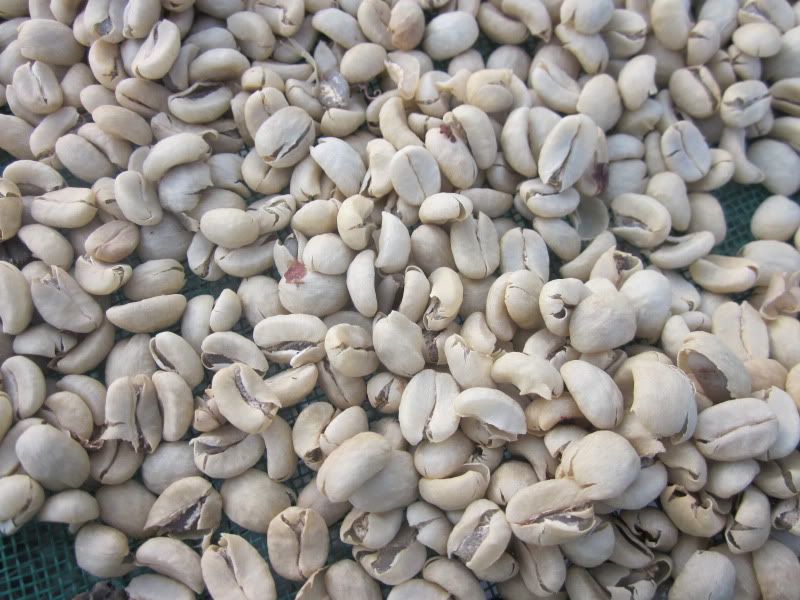
As it dries, the chaff begins to separate from the beans. This is the outside layer of the seeds.

The drying area for second and third grade coffee beans.

Sultanas drying.
Step 7: Removing the Chaff
The next step is ALL MANUAL. And by the appearance of it, difficult. They pour beans a little bit at a time into this contraption and turn a crank to separate the chaff from the bean. Both the chaff and the bean go into the same bag and they will later be winnowed so that only the bean remains. (Winnowing involves tossing everything in the air; the chaff blows away in the wind and the bean falls back down in the container.)
I did not try my hand at this machine, but most of the people in our group who tried it found it difficult. It required a lot of strength. No doubt it would be a lot less economical for Carmen Pampa to do this step of coffee processing if they didn't have so much student labor available. But really, it'd be better if they had a machine to do this.
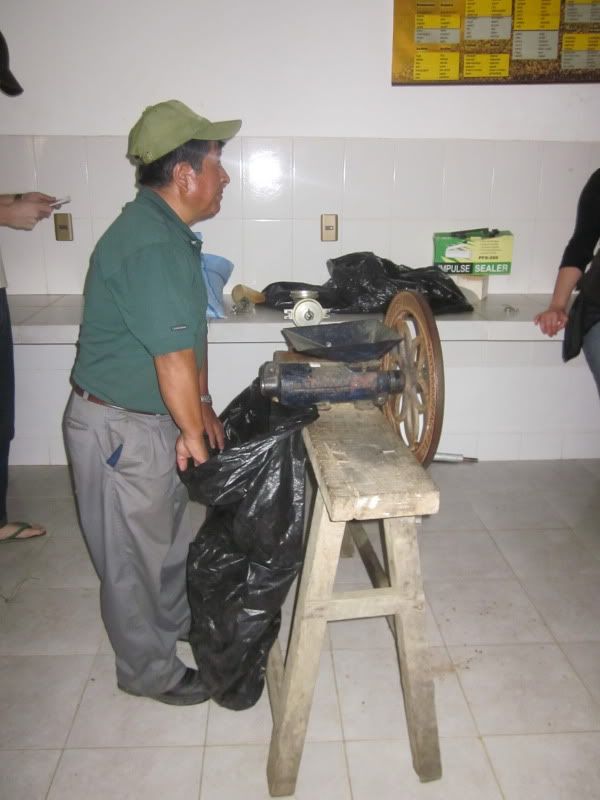
The very manual and difficult to operate machine to separate the chaff from the beans.
Step 8: Roasting
Most of the coffee here is not roasted. It is sold green. Because it's very humid in Yungas, they bring all of their coffee to a warehouse in La Paz and store it there before it's sold.
Roasting in Bolivia is a different process than roasting in the U.S. When I roasted coffee during my barista gig at Whole Foods, I looked on a chart to find what temperature each type of coffee was to be roasted at, poured the coffee into the roaster, set it to the right temperature, and my job was done. About 20 minutes later, I had fresh roasted coffee. The machine first heats the beans to the correct temperature, and as they heat, they change color from green to gold, to light brown, and ultimately to dark brown if you want a dark roast. Once the beans reach the temperature they are set for, the machine begins blowing cool air in to cool the beans down.
The caffeine is stored in the oil, which is on the inside of the bean. As the bean is roasted, the oil eventually comes to the outside of the bean and then burns off. Thus, the lighter the roast, the higher the level of caffeine. A dark roast will look oily, but an extra dark will not because the oil burnt off. Medium and light roasts don't look oily either, but that's because the oil is still inside.
In Bolivia, the process was - as always - more manual. They put the coffee inside a spherical container and put the lid on. That was shoved inside a cylindrical container that looked like a very large garbage can. A flame under the sphere heated the coffee, and a student (and later, members of our group) turned a crank to rotate the sphere so that each bean was evenly roasted. You do that for AN HOUR. Then your coffee is ready.
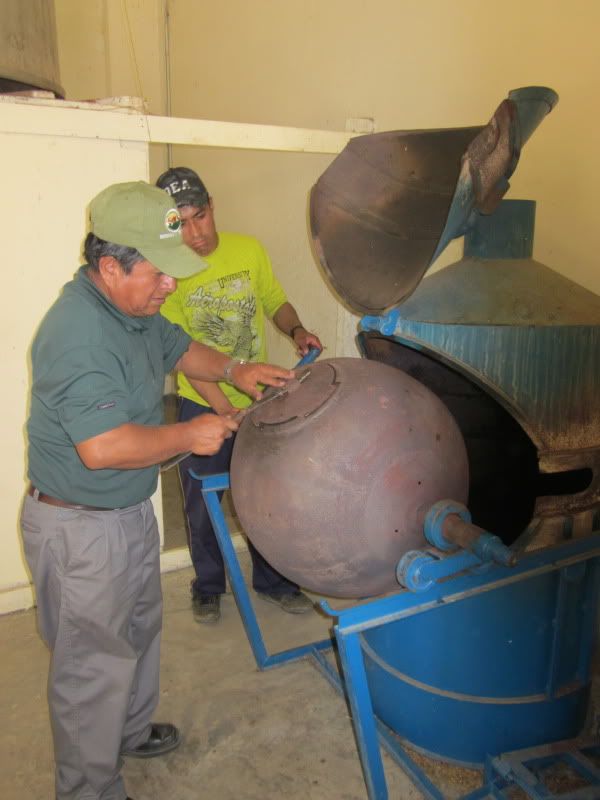
Putting coffee in the roaster.
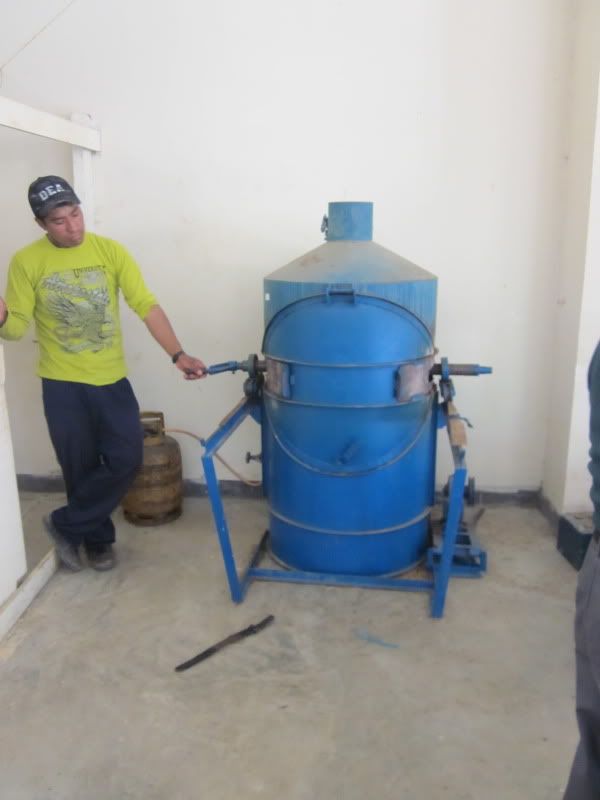
A student, turning the crank to rotate the roasting coffee. This must be done for an HOUR.
Roasting coffee is something that usually happens much closer to the place where the coffee will be consumed. In its dried, green form, the coffee beans are very shelf-stable. All of the steps to get coffee to this stage can be done in poor, coffee-producing countries with cheap labor. Once roasted, coffee beans will go bad within a few weeks if exposed to oxygen. Coffee snobs like me buy fresh-roasted coffee in small batches and then grind it as needed before drinking it so that it does not have a chance to oxidize and go bad. Much of the profits from each pound of coffee you buy goes to the roaster, who is then able to sell you the finished product.
Just Coffee, which is a fair trade coffee roaster that pays very good prices to coffee growers will pay between $1.91 and $3.00 per pound of coffee for green, unroasted beans. It's another $.60 to $.85 for transportation. The rest of the price is all money paid for roasting, packaging, overhead, and profit. And if you buy coffee from a grocery store, then the store gets a cut too. I typically pay about $11/lb for organic/fair trade coffee to a local roaster. It's true that a U.S. roaster has higher overhead and labor costs than a Bolivian one, and I don't begrudge the roaster I buy from the money... but look at how much manual labor goes into each individual coffee bean before it even makes it to the U.S., and all for such a low price!
I now look at my morning drink in a whole new light, and with much more appreciation for the people who did what might have been incredibly manual work (if they didn't have the machines to replace the hand-cranked versions) for very little money.
No comments:
Post a Comment